Showing posts with label False Lashes. Show all posts

Sunday, August 9, 2015

Collab with @girlyoh: Makeup Details

Hey everyone!

I have been waiting what feels like so long to share this collab with you! 
I did a peacock inspired eye look and she followed with a very stunning and edgy nail look :) 

Go gollow +girlyOh! She is amazingly talented and sweet. Her nail game is on point!
Keep reading for makeup details! 
 Eyes: 
To start I used MAC Pro Longwear Concealer 
Makeup Geek Pegasus foiled eyeshadow on the inner lid
Makeup Geek Fantasy foiled eyeshadow in the center
Makeup Geek Day Dreamer and Caitlyn Rose on the outer lid 
Makeup Geek Wisteria in the crease 
     Follow same order of shadows on the lower lash line, smoked out with Wisteria
Makeup Geek High Wire on the inner corner of the eye 

Liner: 
Physician's Formula Eye Booster 2-in-1 liner in Ultra Black 
NYX Cosmetics Glam Liner Aqua Luxe in Glam Lagoon over top of black liner
Urban Decay 24/7 Waterproof Liquid Eyeliner in Retrograde over the black liner as well 

Lashes: 
House of Lashes Iconic lashes 

Brows: 
Makeup Geek Corrupt eyeshadow 


 Lips: 
NYX Cosmetics Retractable Eye Liner in Gypsy Blue on the outer corners 
NYX Cosmetics Retractable Eye Liner in Purple in the center 
Makeup Geek Day Dreamer and High Wire foiled eyeshadows in the center  

 Jewels: 
Jewels came from Porter's Craft & Frame- glued on with lash adhesive 


I hope you guys liked it! 
Thanks again to Michelle at girlyoh for asking me to collaborate with her. I had a lot of fun with this and the nails are amazing! Go follow her and subscribe to her YouTube channel!

Follow Pretty and Put Together on Instagram, Twitter, Pinterest, and like on Facebook to see more beauty related posts :) Thanks for stopping by! 
https://instagram.com/chelseeparker77/

Wednesday, June 10, 2015

How to Apply False Lashes ft. Born Pretty Store

Hello pretty people :)

This week's post is about how to apply false lashes, per request! 
As you know I apply false lashes basically every day. Practice is key to master this technique ;) 
This blog features products that were sent to me from Born Pretty Store
I have a COUPON CODE below so keep reading! 
If you're looking for a good pair of lashes I recommend Blinking Beaute, Velour, Ardell, or Salon Perfect. For beginners, Ardell or Salon Perfect (at Target, WalMart, or Ulta) lashes might be easier for you because they have a smaller lash band. It is harder to hide and keep in place a thick lash band. 
I start off with my makeup all done. I also do my liner first. I recommend applying eyeliner when using false lashes especially if you are just starting because the liner helps hide the lash band. 

I also want to mention that my eye makeup was inspired by Ssssamanthaa from Batalash and her Nudy Plum Halo Eye :) 
STEP 1
Curl your eyelashes
Apply a non-waterproof mascara 
You will need: 
Your favorite lashes :)
Lash glue- 

Tweezers or Eyelash Nippers-  
These tweezers are curved to be used especially for applying eyelashes, they are from 
Use coupon code "PARKG10" for 10% off your order! 
Compact Mirror- optional but up close view of your lashes will help you see if they are on perfectly!
This crystal mirror is also from Born Pretty Store item #15839 
Coupon code "PARKG10" for 10% off once again ;) 

STEP 2
Get out yo lashes 
TRIM your lashes if necessary.. Always always trim them from the outer corner if necessary. If you trim from the inner corner of the lash they won't look right! 
These are Blinking Beaute Lashes in the style No. 1 
Apply a SMALL amount of lash glue to the strip
****The key here is to let your lash glue dry for a bit before applying.. I set mine down and let them dry to a yellowish color. But, if you let them dry too long you will have to pull off the glue and start over.. Try to find the happy medium!

STEP 3
Apply yo lashes using eyelash nippers! 

I always focus on the center of the lash first, pressing it as close to your natural lashes as possible. 
Then using your fingers or regular tweezers, apply the inner and outer corners of the lashes. 
You may have to hold them in place for a few seconds to really get them to stick. 

Also using your tweezers, I like to press my natural lashes to the false lashes.
 *If you notice the inner or outer corner of your lashes sticking to your bottom lashes, this happens to me all the time. Gently keep pulling them apart from the bottom lashes using tweezers until glue completely dries, then they shouldn't do that anymore!

STEP 4
Apply eyeliner onto the lash band to hide it
I am using the Maybelline EyeStudio Gel Eye Liner in Blackest Black
STEP 5
Apply mascara to the lower lashes
Apply mascara to top lashes (if necessary), trying not to get any on the false lashes because that can ruin them! 

Now enjoy your lashes :)) Be sure to stick your lash glue into your purse to carry with you in case you have a lash corner pop off..  It happens! 
Thank you so much for stopping by to read this post! 
P.s. This post was not sponsored 
Be sure to follow Pretty and Put Together on Instagram, Twitter, Pinterest, and like on Facebook for more makeup and beauty related posts :) To follow my personal click my signature below! 
https://instagram.com/chelseeparker77/


Wednesday, March 11, 2015

Duochrome Purple/Pink Makeup Look

Hello :)
I wore this look on Valentine's Day this year, I loved it so much I thought I'd share! So, if you want to see how I got this look keep reading! 
Eyes: 
First I apply MAC Pro Longwear Concealer in NW20 to prime the eyes. 
As a transition shade in the crease I applied Peach Smoothie by Makeup Geek with a Sigma E40 blending brush. 
Again in the crease I apply Birkin & Dusty Rose from Anastasia Beverly Hills using the E40, focusing the color on the outer corner and blending in. For this look you don't want any harsh lines so blend away!! 
Now take Iridescent Purple (purple with blue iridescence) by Anastasia Beverly Hills and apply it on the outer corner of the lid area using any flat eyeshadow brush. I also layered with Opaline to darken the purple a bit.
On the center of the lid to the inner corner comes my favorite color in this look.. ELECTRO by Anastasia Beverly Hills!! This shadow is amazing! It's a duochrome bright purple with blue iridescence color so it reflects the different colors in different lighting. If you apply this with MAC Fix+ or eye drops the color will become even more intense.
(Indoor lighting, you can see how they reflect different colors)
On the lower lash line use the same ombré effect from Opaline, Iridescent Purple, to Electro into the inner corner. 
To highlight the brow bone and inner corner of the eye I used Bling from Makeup Geek.  


To see the Anastasia Beverly Hills shadows swatches click here

Lashes: 
These lashes are Velour Lashes "Loose Ends" lashes (look up coupon codes!)
Liner: 
Maybelline gel liner in "Blackest Black" on top.
Nyx Cosmetics retractable eye pencil in "Purple" in the waterline.
Brows: 
Anastasia Beverly Hills Dipbrow in "Dark Brown." 
Face: 
Revlon ColorStay 24 hours liquid foundation for normal/dry skin in "Nude" & Revlon ColorStay powder in "Fair." Anastasia Beverly Hills "Banana" powder under the eyes.
Contour: 
Nose contour is Anastasia Beverly Hills Fawn. Cheeks & forehead are Fawn & Java
Blush: 
Makeup Geek "Head Over Heels" and MAC "Margin." 
Highlighter: 
Hourglass Ambient Lighting Powder in "Luminous Light 
on the cheekbones, bridge of the nose, and cupid's bow.
Lips: 
Gerard Cosmetics "Buttercup" lipstick and "Butter Cream" lighted lip gloss (look up coupon codes! I've never paid full price for these!!).
Setting Spray: 
I used Urban Decay "De-Slick" makeup setting spray to set everything since I have oily skin :) 
This stuff is the best!  
Jewelry: 
Earrings are from a Premier Designs jewelry party. 

Thanks for reading! Also, I had someone ask me what my hair color is, and it's Joico 5XR :) 
Be sure to follow Pretty and Put Together on Instagram, Twitter, Pinterest, and like us on Facebook! New blog post every week! xo
https://instagram.com/chelseeparker77


Tuesday, February 17, 2015

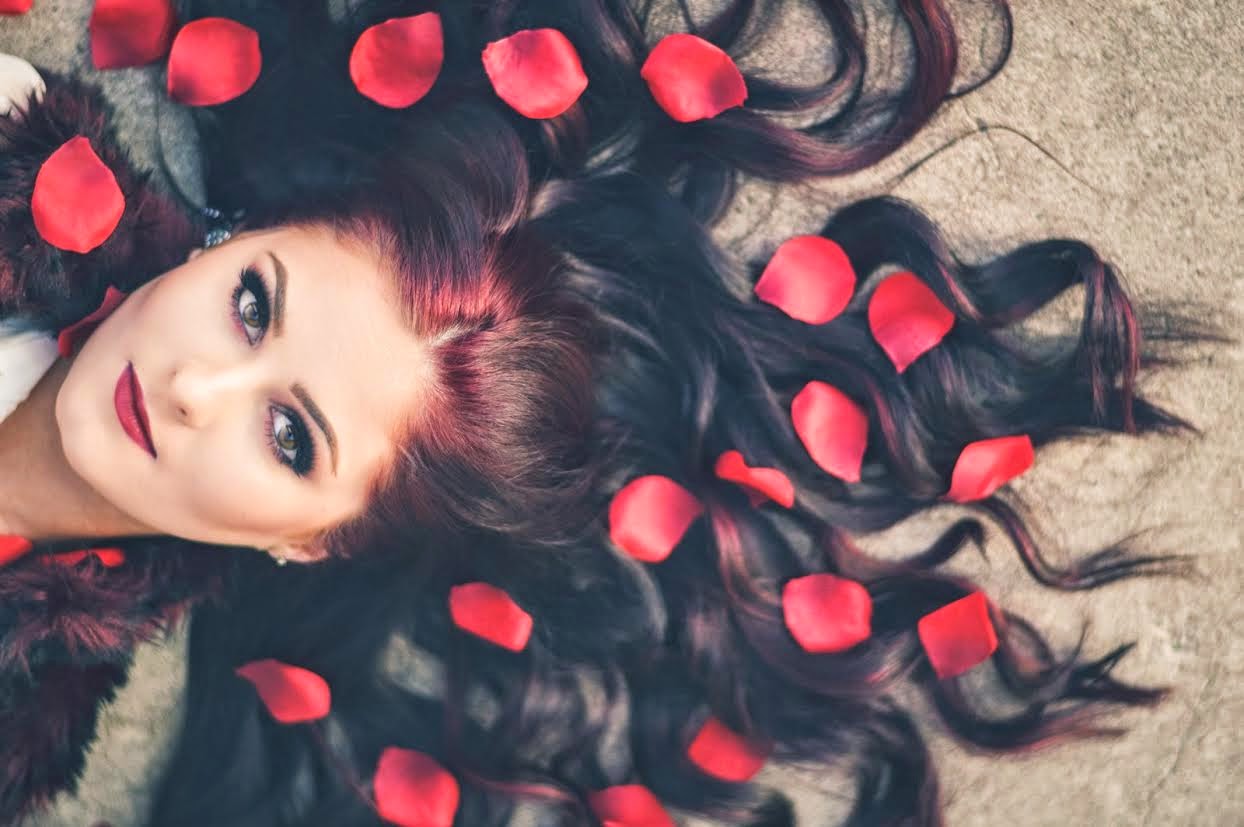
Valentine's Day Photoshoot with Whitney Marie Photography

Hi everyone! I hope you all had an amazing Valentine's Day! 
Whitney happened to ask me to do this shoot last week because we thought it would be so fun and the weather has been great. So we grabbed some props & had some fun! Be sure to check out Whitney's photography WEBSITE, on Instagram, Pinterest, and like her page on Facebook :) She does an amazing job & is very talented. We had a great time with this shoot, lots of laughs! 
Keep reading for makeup details & some clothing details as well <3   
This post is going to be long... sowy!


Here I'm wearing a faux fur vest I got from Buckle a while back :) I don't get to wear this much so I thought this was the perfect occasion.

The lipstick I'm wearing is Rimmel London Kate Lipstick in 01 with Gerard Cosmetics Cherry Cordial & Palladio herbal waterproof lip liner in Red Rose.


This is a dress I purchased from a store called Details. I actually bought this to wear to the Katy Perry concert last September!

My eyes are Makeup Geek eyeshadows in Peach Smoothie, Cocoa Bear, Bitten, and Bling (highlight), Anastasia Beverly Hills Eyeshadows in Metal (on the lid area), Deep Plum, Birkin, Dusty Rose, & Fresh Peach. 
Eyeliner is Maybelline gel liner in Blackest Balck & Master Kajal in Onyx Rush on the waterline. 
Brows are Anastasia Beverly Hills Dipbrow in dark brown. 
Eyelashes are "Bianca" from Lena Lashes. They are SO fluffy & beautiful & not too long! 
Contour is Anastasia Beverly Hills contour kit. Blushes are Margin by MAC, & Head Over Heels from Makeup Geek. 
Cheek Highlighter is Becca Shimmering Skin Perfector Pressed in Opal.
Lips are MAC Saint Germain lipstick & Snob lipglass with Nyx lip liner in Sand Pink.
REMEMBER: Always search for coupon codes :)


 The shoes below are Bamboo wedge booties.
"Zooshoo Bamboo DEBRAH-01N Lace Up Wedge Ankle Bootie" I can't find them anywhere, but there are tons of similar shoes!
Jeans are from Bohme Boutique Flying Monkey brand.


These shoes are Jessica Simpson slingback platform pumps :) In these pictures you will see both the red ones & black ones! (Macy's) 


We have reached the end! Thank you, thank you, thank you for checking out Pretty & Put Together & thank you so much WHITNEY for taking these pictures. She is so beautiful inside & out. I have never met a more loving & bubbly person :) Please go check her out!
All photos were taken by Whitney Marie Photography #wmariephotography in Pocatello, ID. She has given me permission to post these on this blog.

Be sure to follow us on Instagram, Twitter, Pinterest, and like us on Facebook!  
http://instagram.com/chelseeparker77