Showing posts with label Foundation. Show all posts

Monday, September 7, 2015

Loreal Infallible Pro-Matte Foundation Review


I've been wanting to do this blog post for so long now and just haven't had the time. I've been using the L'oreal Infallible Pro-Matte foundation for months now. This is my ABSOLUTE favorite foundation thus far. Beyond any high-end foundation I've tried, this truly stays on my face and doesn't break up throughout the day. I have pretty oily skin with some acne scarring. The cost is around $12-13 at Ulta and WalMart.
PROS:
Coverage- medium but buildable 
Long wearing (my days start at 6am and end at 11pm, wears well all day)
Doesn't break up 
Finish- matte without looking too flat 
Oil control 
Price 
Quantity 
Availability of shades 
Packaging (nice for travel/ tubes are more sanitary)


CONS: 
Applies best with Beauty Blender for me 
Can look cakey if you apply too much 
Can look streaky when applied with a brush 
Price for drugstore (it's worth every penny..)

There you have it :) I would definitely recommend this foundation. Here is a photo of me wearing it.
Be sure to follow Pretty and Put Together on Instagram, Twitter, Pinterest, and like on Facebook
Thank you all so so much for 2000 followers on Instagram!! I've had an incredible amount of support so far and I'm overwhelmed with happiness ❥
https://instagram.com/chelseeparker77/

Thursday, July 16, 2015

Tarte Amazonian Clay 12-Hour Full Coverage Foundation Review

 This post is really overdue since I've had this foundation for a little over 3 months! My skin type is combination oily. At times I get really dry spots on my skin, but for the most part my skin is oily. 
This foundation is available at Ulta and Sephora. I bought the shades "Light Beige" and "Medium Beige" for my tan days. The cost is more high end, at $39. 
PROS 
Coverage (some spots may still show through.. but it's preeettyy full coverage)
Consistency 
Amount of Product
Long-wearing 
Packaging (Easy to use/good for travel)
Cruelty-free Brand 
Selection of shades 
Dries matte 
Perfect for oily skin 

CONS 
Can settle in fine lines and large pores (most foundations do this on my anyway)
Can look cakey if too much is applied 
Clings to dry patches (may not be the best for dry skin types)
I truly love this foundation. It applies really well to my skin and stays on all day. For me it lasts even longer than 12-hours. I use a translucent setting powder to set it since I am extra oily. I use the Morphe Brushes M439 to apply with MAC Fix+

Be sure to follow Pretty and Put Together on Instagram, Twitter, Pinterest, and like on Facebook for more beauty posts!
https://instagram.com/chelseeparker77/


Wednesday, March 11, 2015

Duochrome Purple/Pink Makeup Look

Hello :)
I wore this look on Valentine's Day this year, I loved it so much I thought I'd share! So, if you want to see how I got this look keep reading! 
Eyes: 
First I apply MAC Pro Longwear Concealer in NW20 to prime the eyes. 
As a transition shade in the crease I applied Peach Smoothie by Makeup Geek with a Sigma E40 blending brush. 
Again in the crease I apply Birkin & Dusty Rose from Anastasia Beverly Hills using the E40, focusing the color on the outer corner and blending in. For this look you don't want any harsh lines so blend away!! 
Now take Iridescent Purple (purple with blue iridescence) by Anastasia Beverly Hills and apply it on the outer corner of the lid area using any flat eyeshadow brush. I also layered with Opaline to darken the purple a bit.
On the center of the lid to the inner corner comes my favorite color in this look.. ELECTRO by Anastasia Beverly Hills!! This shadow is amazing! It's a duochrome bright purple with blue iridescence color so it reflects the different colors in different lighting. If you apply this with MAC Fix+ or eye drops the color will become even more intense.
(Indoor lighting, you can see how they reflect different colors)
On the lower lash line use the same ombré effect from Opaline, Iridescent Purple, to Electro into the inner corner. 
To highlight the brow bone and inner corner of the eye I used Bling from Makeup Geek.  


To see the Anastasia Beverly Hills shadows swatches click here

Lashes: 
These lashes are Velour Lashes "Loose Ends" lashes (look up coupon codes!)
Liner: 
Maybelline gel liner in "Blackest Black" on top.
Nyx Cosmetics retractable eye pencil in "Purple" in the waterline.
Brows: 
Anastasia Beverly Hills Dipbrow in "Dark Brown." 
Face: 
Revlon ColorStay 24 hours liquid foundation for normal/dry skin in "Nude" & Revlon ColorStay powder in "Fair." Anastasia Beverly Hills "Banana" powder under the eyes.
Contour: 
Nose contour is Anastasia Beverly Hills Fawn. Cheeks & forehead are Fawn & Java
Blush: 
Makeup Geek "Head Over Heels" and MAC "Margin." 
Highlighter: 
Hourglass Ambient Lighting Powder in "Luminous Light 
on the cheekbones, bridge of the nose, and cupid's bow.
Lips: 
Gerard Cosmetics "Buttercup" lipstick and "Butter Cream" lighted lip gloss (look up coupon codes! I've never paid full price for these!!).
Setting Spray: 
I used Urban Decay "De-Slick" makeup setting spray to set everything since I have oily skin :) 
This stuff is the best!  
Jewelry: 
Earrings are from a Premier Designs jewelry party. 

Thanks for reading! Also, I had someone ask me what my hair color is, and it's Joico 5XR :) 
Be sure to follow Pretty and Put Together on Instagram, Twitter, Pinterest, and like us on Facebook! New blog post every week! xo
https://instagram.com/chelseeparker77


Tuesday, March 3, 2015

The BeautyBlender: Review & Info

Haay!
This week is all about the beautyblender
I've been using this now for over three weeks to see how I liked it and... I LOVE it! I was one of the doubters at first because of the price ($19.95), the fact that it is a sponge, and that you use it damp. That just didn't make sense to me. Give it a chance.. It won't fail you. 
I got my beautyblender sponge and solid cleanser from Nordstrom (the particular set isn't available right now). There are a few types of beauty blenders and combinations of blenders and cleansers. This pink one is the original, they now have a pure sponge, pro sponge, and micro mini sponges.

When you get the beauty blender you might be shocked (like I was) about how teeny tiny it is. What is so crazy about it is that as soon as you wet the sponge it gets about twice as big! So you want to put the sponge under water and squeeze until it stops growing. Squeeze out excess liquid with a towel.
One thing to be aware of... This sponge should be used wet!!! 
You can see in this picture how much bigger it gets after wetting it, compare it to the package! It doesn't even fit into the container when it's wet. Set it on top of the container to air dry, and it will eventually fall back into the container once it shrinks :)
How I use it: I have dipped the sponge into my makeup before and I have also just used it to blend out my makeup. I personally use the sponge mostly for concealer (eyes, under eyes, forehead, bridge of the nose, chin). I put the concealer on with my fingers and then blend it out with the wet beauty blender. Seriously... FLAWLESS application with this.
My sister uses it for foundation and concealer and loves it for that, and I know other people use it for liquid contour and it works great! It really leaves an amazing airbrush finish. You want to "bounce" it onto your skin.
As far as the solid beautyblender cleanser goes, I actually really like it. I found that it can take a while to clean the sponge (or maybe mine was just super dirty..) so I combined this cleanser with a makeup remover.
You'll notice that when you wash it some pink color will come out.. Don't worry your beauty blender is not full of chemicals used to color it and it won't completely wash out. The beautyblender is latex free, recyclable, and non-allergenic. I really like the smell of it too when it comes brand new :)
I truly love this little guy :) He's changed the way I apply my makeup.. And they just released a cute little travel case that I have to have! *The ONE negative thing about this is that they recommend replacing this every three months. I probably won't but we will see how clean I can keep it before it starts to affect my skin!
If you think that the other knock-off sponges will do the same things that the beautyblender does you're wrong! I understand that some of the other sponges out there are less than half the price, but they are going to soak up more product and not apply as well. I would say go ahead and splurge on the original beautyblender.
https://instagram.com/chelseeparker77I hope you enjoyed this post & learned something new! Follow Pretty and Put Together on Instagram, Twitter, Pinterest, and like us on Facebook! xoxo

Thursday, October 23, 2014

Brushes for Flawless Foundation: Sigma

If you haven't ever tried using a brush to apply your foundation you are missing out! Using a brush helps to really smooth the foundation and apply it into your skin for longer lasting coverage. I was introduced to this brand, Sigma, by the YouTube beauty blogger, Jaclyn Hill (she is one my favorite makeup artists on YouTube). The quality of these brushes is amazing! These brushes have been compared to MAC brushes as an exact dupe. 
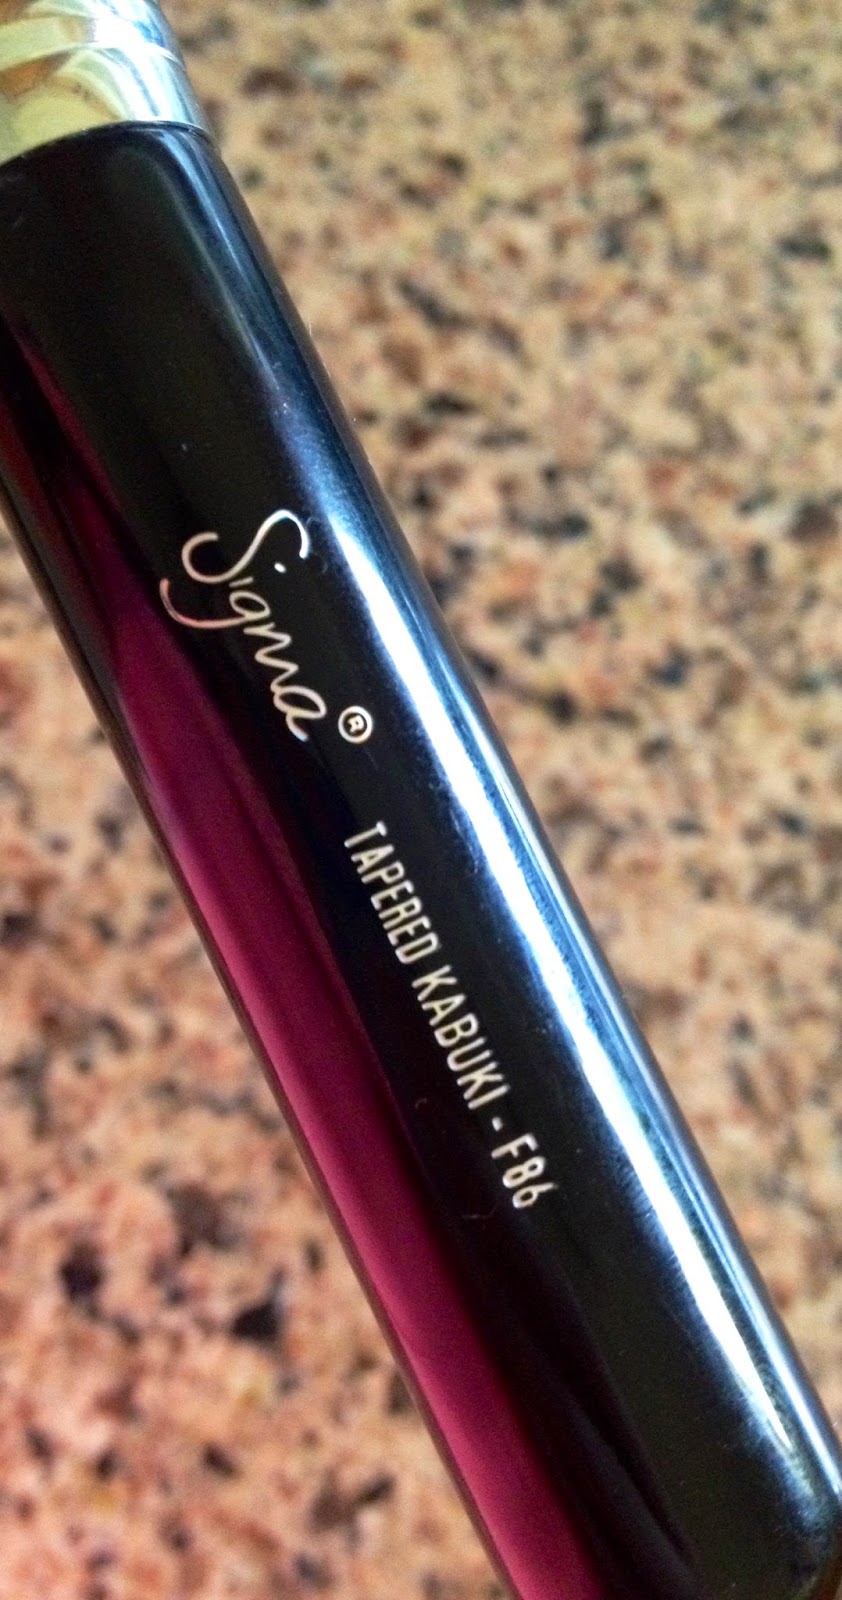
These two foundation brushes help to absorb the excess product. These are the F80 and F86 foundation application brushes. Each of these are $21.00; I know that is on the expensive side but these should last you years with the right care (there are often discount codes featured on the YouTube channels of Jaclyn Hill, Carli Bybel, and SMLx0)! These brushes are made with Synthetic Sigmax bristles. I got them a few months ago and, as you can see, they are still in great condition. These pictures were taken right after washing and drying them, and they still look brand new! 
The Sigma F80 Flat Kabuki brush is used to apply foundation to the flat parts of your face such as forehead, chin, cheeks, and nose. The brush is so soft you will want to brush your face with it all day If you are wanting to try something from Sigma I would recommend trying this brush first. I have tried the flat foundation brushed and found that I got a much smoother application with this flat top brush. I wouldn't recommend using this for applying powder, it is made to apply cream and liquid makeup products. 
The F86 Tapered Kabuki is made for areas of your face that are difficult to cover with the flat top kabuki such as they eye area. I really used this brush for highlighting my lids and under-eye area, middle forehead, nose and chin. This brush is also made to apply cream and liquid products. The shape of this brush is perfect for applying product in the eye area. This brush is also very dense and helps to pick up the excess product so your makeup is never cakey (for a no-fail under eye application make sure to brush back and forth to get in all those pesky creases)!
I would absolutely recommend these brushes to anyone. It is almost effortless to get the perfect flawless foundation with these two. If you aren't confident in trying a foundation brush just watch one of Jaclyn's videos. She, along with a lot of other makeup gurus love the Sigma brushes, and the F80 has been a top seller on Sigma since it's release! 
Have a great day everyone! This post is not sponsored. 
http://instagram.com/chelseeparker77