Showing posts with label Nyx Cosmetics. Show all posts

Sunday, August 9, 2015

Collab with @girlyoh: Makeup Details

Hey everyone!

I have been waiting what feels like so long to share this collab with you! 
I did a peacock inspired eye look and she followed with a very stunning and edgy nail look :) 

Go gollow +girlyOh! She is amazingly talented and sweet. Her nail game is on point!
Keep reading for makeup details! 
 Eyes: 
To start I used MAC Pro Longwear Concealer 
Makeup Geek Pegasus foiled eyeshadow on the inner lid
Makeup Geek Fantasy foiled eyeshadow in the center
Makeup Geek Day Dreamer and Caitlyn Rose on the outer lid 
Makeup Geek Wisteria in the crease 
     Follow same order of shadows on the lower lash line, smoked out with Wisteria
Makeup Geek High Wire on the inner corner of the eye 

Liner: 
Physician's Formula Eye Booster 2-in-1 liner in Ultra Black 
NYX Cosmetics Glam Liner Aqua Luxe in Glam Lagoon over top of black liner
Urban Decay 24/7 Waterproof Liquid Eyeliner in Retrograde over the black liner as well 

Lashes: 
House of Lashes Iconic lashes 
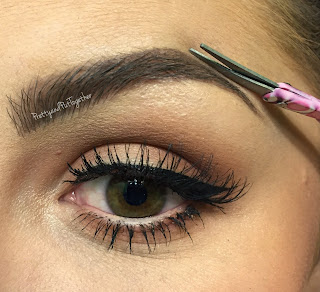
Brows: 
Makeup Geek Corrupt eyeshadow 


 Lips: 
NYX Cosmetics Retractable Eye Liner in Gypsy Blue on the outer corners 
NYX Cosmetics Retractable Eye Liner in Purple in the center 
Makeup Geek Day Dreamer and High Wire foiled eyeshadows in the center  

 Jewels: 
Jewels came from Porter's Craft & Frame- glued on with lash adhesive 


I hope you guys liked it! 
Thanks again to Michelle at girlyoh for asking me to collaborate with her. I had a lot of fun with this and the nails are amazing! Go follow her and subscribe to her YouTube channel!

Follow Pretty and Put Together on Instagram, Twitter, Pinterest, and like on Facebook to see more beauty related posts :) Thanks for stopping by! 
https://instagram.com/chelseeparker77/

Thursday, June 18, 2015

Batalash x SauceBox Palette Review & Swatches

Hey beauties
This week I received my Batalash x SauceBox eyeshadow palette after pre-ordering. FINALLY!
I've been dying to get this in the mail. I am a huge fan of the Batalash girls. Ssssamanthaa is my new bff, basically.

It was love at first sight.
Here it is in all its glory. Isn't the packaging so pretty?
I can't wait to create more looks with this!
This palette comes with 8 huge pans of gorgeous color at a cost of $60.00
The top four shades are all matte/neutral shades:

The bottom four shades are all shimmer/pops of color:
All of the colors are very pigmented, some more than others.
PROS:
Pigmentation 
Packaging is sturdy/travel friendly and gorgeous 
Product size/amount 
Color selection 
Removable pans 
Cost 
Easy to blend 
Supporting a bad A group of girls

CONS: 
Shipping delays 
Pans do not have their names on the bottom
Limited edition

Here is a look I created using the palette inspired by Ssssamanthaa :) I used Vanilla, Winter Brown, Cinnamon, and Nova. 
I also used NYX Retractable Liner in Gypsy Blue and Anastasia Beverly Hills Pink Champagne Eyeshadow. Lashes are Velour Lashes "It's Sho Fluffly."
Here is another look I created using Vanilla, Winter Brown, Cinnamon, Enigma, and Lace Noir.

Overall, I am so impressed with this palette. I would definitely purchase from SauceBox Cosmetics again, despite the shipping delays. They are still a small business and growing fast.
Be sure to follow Pretty and Put Together on Instagram, Twitter, Pinterest, and like on Facebook for more makeup looks and other things beauty related :) Thank you so much for reading! 
https://instagram.com/chelseeparker77/

Friday, June 5, 2015

Glowing Dewy Skin Tips & Tricks

Hi everyone!
This week is all about how to get glowing, dewy looking skin :) 
Even if you have dry skin, these tips can work for you. 
And if you have oily skin like me, you can still matte out your skin and make it appear to be dewy and glowing!
Women's Health Magazine has 30 great tips for glowing skin here: http://www.womenshealthmag.co.uk/beauty-style/skin/108/30-easy-tips-for-glowing-skin/
Some tips include applying sunscreen, clean your makeup brushes, use a serum, sanitize your phone, use retinol, get enough sleep, etc. Go check it out!
Here are some tips and tricks I personally use! 
First, obviously moisturizing  and taking care of your skin is the first step to glowing skin.
There are many foundations you can use that give your skin a glow, such as the L'Oreal True Match Lumi Foundation, and the Giorgio Armani Luminous Silk Foundation.

For me, personally, I use a matte foundation combined with MAC Fix+. After priming my face, I spray a few sprays of MAC Fix+ on my face and one spray on my foundation brush. This will give your skin a dewy finish and also help the foundation adhere to your skin. $22

This foundation brush is the Morphe M439 Deluxe Buffer brush and it's amazing!! $13.96
After you apply foundation if you want your skin extra glowy you can apply a liquid illuminator all over your face. I use the NYX Liquid Illuminator in the color Sunbeam. $7.49
The Becca Cosmetics liquid illuminators are a beautiful high end option. $41
Apply a small amount to the back of your hand and load up your foundation brush, then apply like you would a foundation.
 Apply a powder after you use the illuminator if you have oily skin like me. I use a translucent powder so it's not covering up the liquid illuminator. Two really great translucent powders are the e.l.f. Studio High Definition Powder in Sheer, or the MAC Set Powder in Invisible.
Apply a matte bronzer for contour (my preference), then move on to blush.
I have three blushes that leave a nice, subtle glow on the cheeks. 
NARS blush in Orgasm is so beautiful! It has quite a lot of shimmer to it so if you don't like that, don't buy this.. "Peachy pink with shimmer." $30 
MAC blush in Margin is a gorgeous, bronzy blush. As you can see its so pretty and glowy without al the shimmer :) 
Makeup Geek Cosmetics blush in Head Over Heels. This blush is a "light bubblegum pink with sligh shimmer." So glowy and beautiful :) This one is great too because it's so affordable! $9.99
Highlighters are so important for glowing skin.. If not the most important! 
I have a highlighters blog post you can check out for swatches of all of these! Read HERE.

These three are my personal favorites: 
Hourglass Ambient Lighting Powder in Luminous Light. This highlighter is pretty subtle, you could apply this to your whole face as a setting powder if you like! $45

TheBalm Cosmetics Mary-Lou Manizer :) This is a pretty intense highlight, but it's great for more fair skin tones. $24

Becca Cosmetics Shimmering Skin Perfector Pressed in Opal. This highlighter is very intense, and the color opal is probably not great for those with fair or porcelain skin tones, try Moonstone instead :) I love the formula of this highlighter as well, it's so smooth! $38
Anastasia Beverly Hills contour refill in Sand is such a pretty highlight. This one has pink undertones :) I apply this one every day on the bridge of my nose, tip of my nose, and cupid's bow using my finger for the most intensity! $14 individual pan
LAST STEP is so apply a dewy finishing mist! 
Applying a makeup setting spray will help hold your makeup in place all day. There are both matte and dewy finishing sprays available. 
My three favorite dewy finishing sprays right now are: 
e.l.f. Makeup Mist and Set. This one I always keep in my purse because it's so affordable and works pretty well! Plus this one has good ingredients like aloe, cucumber, green tea, and vitamins A, C, and E. $3 at Target
Pixi by Petra Makeup Fixing Mist. This one has rose water and green tea :) I use this one every day all over my face! $15 at Target 
 MAC Fix+. Spray this one all over your face again for extra dewy skin. This one will make your skin dewy to the touch, because I have oily skin, I only use this every so often if my skin is a bit dry or I applied too much powder! $22
 On my cheekbones is Becca Shimmering Skin Perfector Pressed in Opal ;)
 

So there you go!! I hope you liked this post and learned something new! Thanks for stopping by :) 
Follow Pretty and Put Together on Instagram, Twitter, Pinterest, and like on Facebook to see more makeup and beauty related posts! Follow my personal page by clicking my signature below. xo
https://instagram.com/chelseeparker77/

Thursday, May 21, 2015

Brow Tutorial: Anastasia Beverly Hills Dipbrow Pomade

Hi peeps! 
I have been pretty resistant to post a brow tutorial because my brows aren't always perfect, or alike! But I have to remind myself.. Your brows and liner are sisters, not twins ;) I'm not a professional makeup artist in any way nor do I think I am. Take my advice as you will! This is just how I like doing my brows!
So here's everything I use to do my brows :) I pluck my brows every morning before I do my makeup and I probably trim my brows every few weeks when I feel the need...
STEP ONE:  
I fill in my eyebrows after I apply foundation and powder, but before I apply mascara and eyeliner (I didn't wait to do that for these pictures).
Pluck and comb your brows :) Some people prefer to do this after they have drawn on their brows. I have finally grown mine to about what they should be so I know where to and where not to pluck them. I use a spoolie to comb my brows :)
This picture from Beauty Tips is an example of what your brow shape should look like!
STEP TWO: 
I use a NYX angle liner brush and Anastasia Beverly Hills Dipbrow Pomade in Dark Brown to trace the bottom line of my brow. I try to make it darker on the outer tail. Some makeup artists will use two different colors of brow product for an ombre effect. 
Use your brush to blend the product upward. 
 I just want to mention that the brow pomade is $18.00 but I have had this since Christmas and it is no where near gone. This pomade will dry out so be careful to close the lid tight. 
If you're just starting and don't want to spend that much on a brow product, I used the e.l.f. brow duo for a long time and loved it! $3.04 at Target.

STEP THREE: 
Next I trace the top of my brow. I always take the arch up a little higher and the tail longer because I like how it looks :) I also leave a bit of the inner part of the brow blank so it doesn't look boxy.  
Also, my left eyebrow is higher than the right, so I create the arch on the right eyebrow a little higher to match.  

STEP FOUR:   
Now fill in the entire brow. Focus on putting most of the product on the tail of the brow. I just try to drag product upward on the inner part. 
STEP FIVE: 
Comb, comb, comb ;) Combing in the pomade will help make your brows look more natural and blended. 


STEP SIX: 
Now take come concealer on the back of your hand. you don't want it to be too much lighter than your foundation color (just ignore the fading tan on the back of my hand haha).
I use the Garnier Skin Renew Anti-Dark Circle Eye Roller. I use this because it's not too light and it's easy to quickly apply to the back of my hand. Then I get some of the product on this flat brush from BH Cosmetics.
 Trace the underneath and top of your brow to get rid of any imperfections. I like my brows to look really sharp and crisp :) This way if you make any mistakes you don't have to worry too much, they are fixable! 

STEP SEVEN: 
This step I do not do every day. You always want to trim and shape your brows after filling them in so you don't go overboard and end up with nineties, three-haired brows. 
Comb your brows again, then trim off any hairs that are straying from the shape of your brow! 
 These trimming scissors came in a kit I was gifted at Christmas a few years ago. You can find some like these in the makeup section of a store or by the nail supplies, they might be labeled as beard trimming scissors (haha) but as long as they are small they can be used for your brows too.
STEP EIGHT: 
The last step is to comb your brows again and apply brow gel. Applying a brow gel (tinted or clear) will help hold every brow hair in place. 
I use the Sonia Kashuk clear brow gel (it's dirty from using it) from Target for $5.99. I have also tried the clear brow gel from the Ulta brand and it worked really well too.

Now I would move onto doing the rest of my eye makeup :) I just did it first for these pictures.
Your brows are DONE! 
I hope you found this tutorial interesting and maybe learned something new :) I'm sure my brow routine will change again in the future but this is how I've been doing them for a long time now!
Follow Pretty and Put Together on Instagram, Twitter, Pinterest, and like on Facebook to stay updated and see looks I create!
Have a great Memorial Day weekend! 
https://instagram.com/chelseeparker77/